Revolved Half Moon Pose (Parivrtta Ardha Chandrasana)

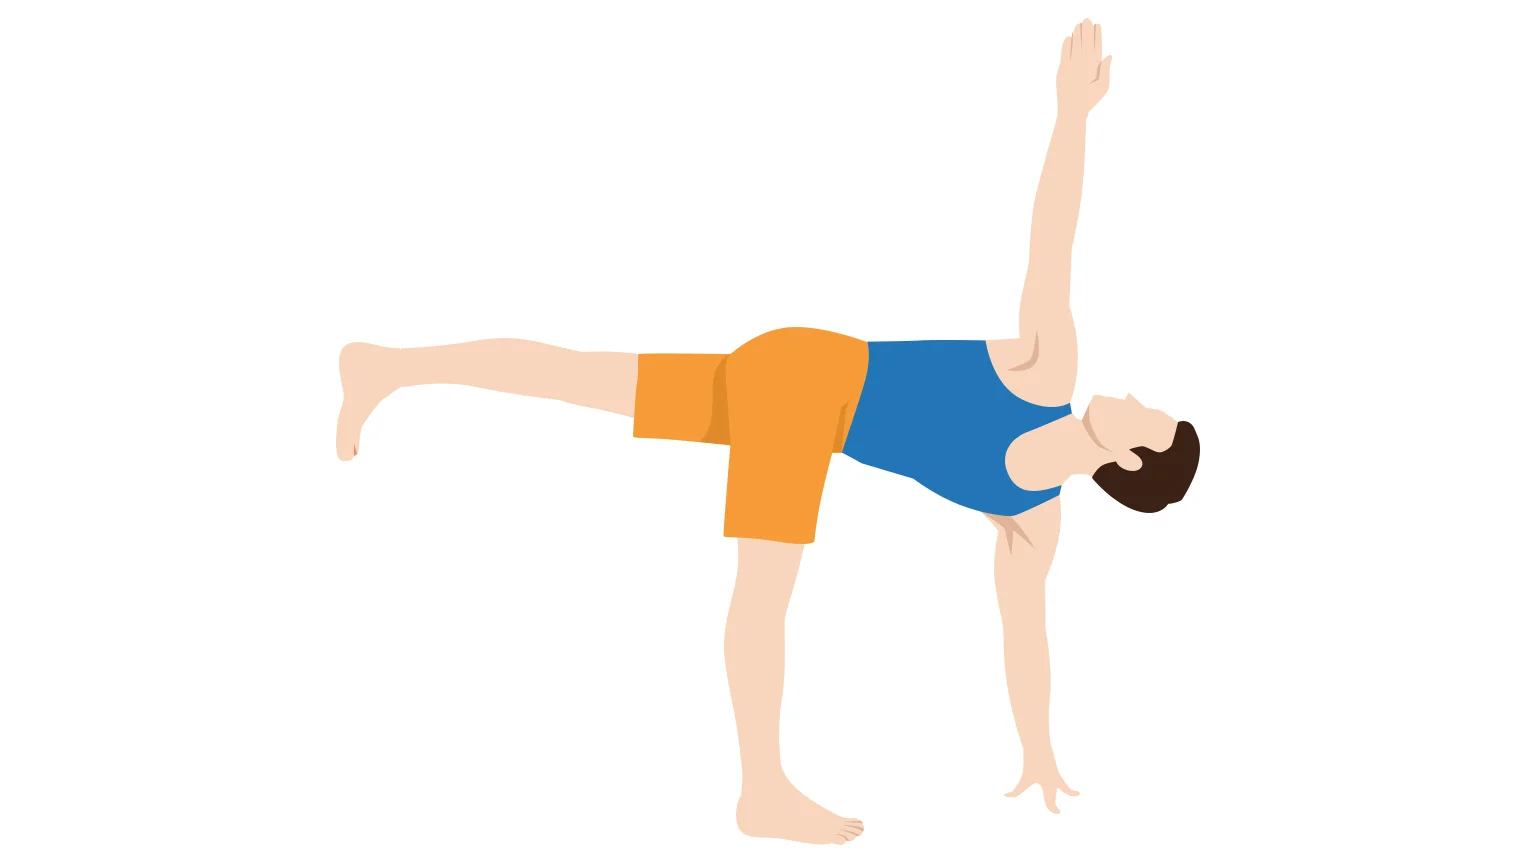
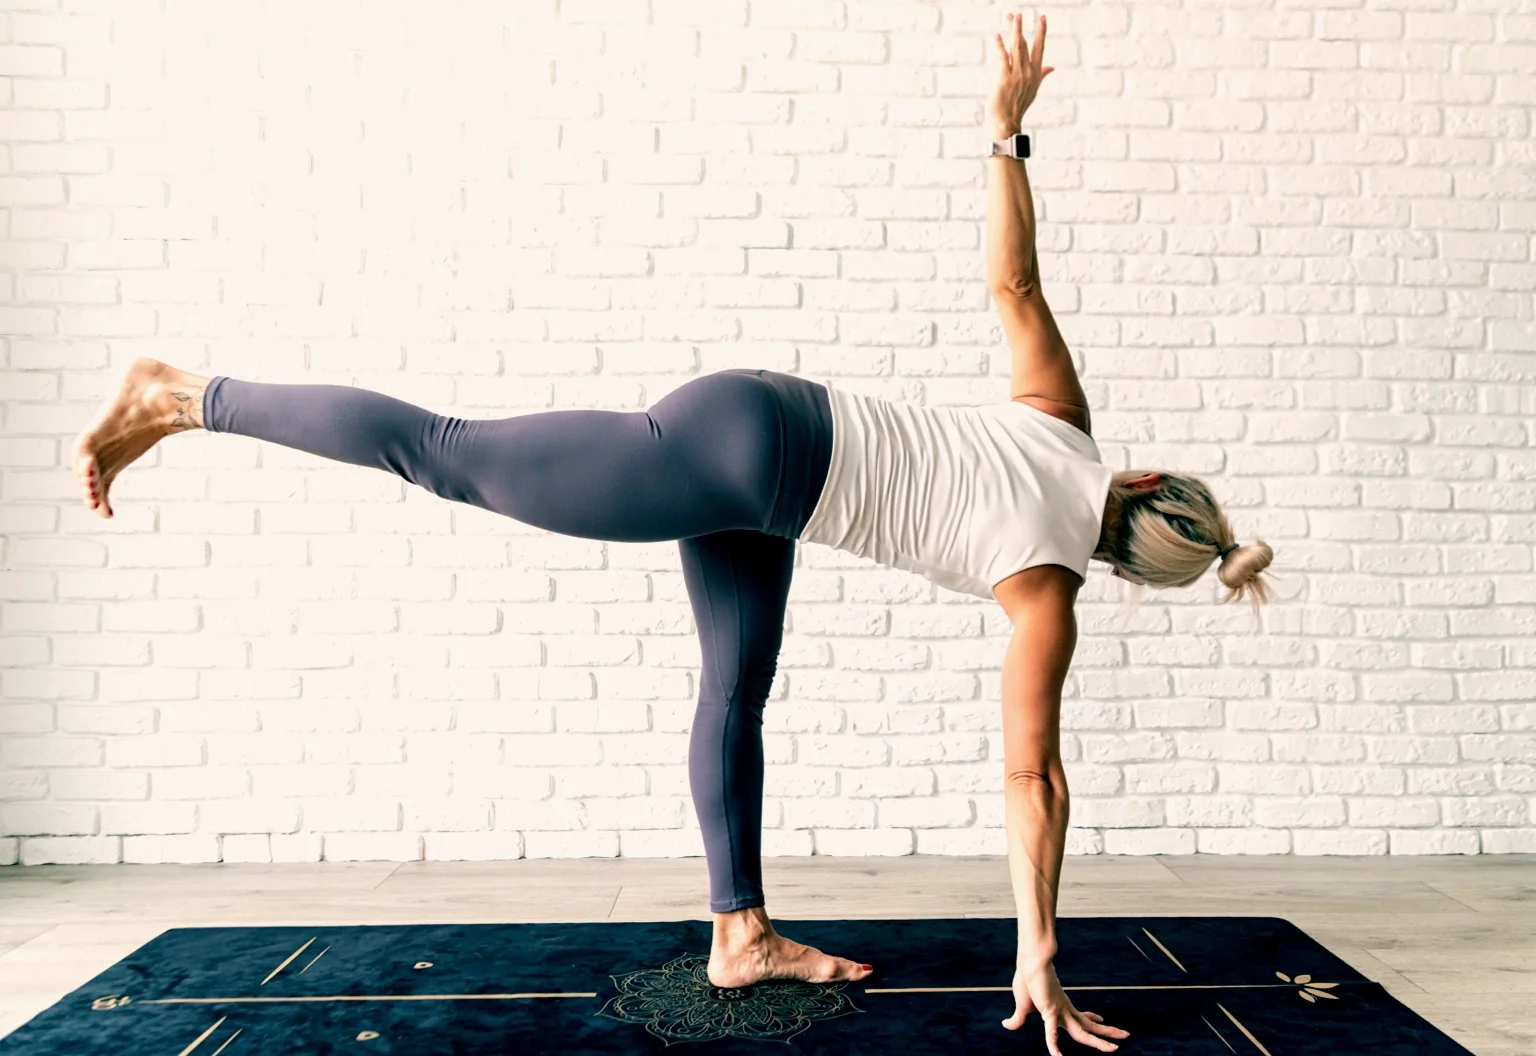
The Revolved Half Moon Pose, also known as Parivrtta Ardha Chandrasana, Twisted Half Moon Pose and Rotated Half Moon Pose, is a standing yoga pose. In this pose, the yogi stands on one leg while extend the other leg backwards, and twists in the torso with one arm pointing up towards the sky and the other reaching to the ground. The yogi’s gaze is directed upwards toward the extended hand.
- Position: Standing.
- Stretched body parts: Hamstrings, quads and calves (of the standing leg), spine, obliques, chest and shoulders.
- Benefits: This pose promotes improved balance, coordination and focus. It can help stretch and strength the muscles in your legs, ankles and core, while enhancing the flexibility of your spine. The twisting form encourages better digestion.
- Symbolism: The half moon part of this pose reflects the moon’s symbolic role in many cultures, representing the cycles of life, change and balance. This pose demands a blend of strength and flexibility.
- Similar poses: Half Moon Pose (Ardha Chandrasana), Revolved Triangle Pose (Parivrtta Trikonasana), Warrior III Pose (Virabhadrasana III).
Meaning of Parivrtta Ardha Chandrasana
Parivrtta Ardha Chandrasana can be broken down into several parts. The first “Parivrtta” means “revolved” or “turned”. “Ardha” means “half” and “Chandra” refers to the moon. And, of course, “Asana” simply means “pose”. Together, the words translate literally into “Revolved Half Moon Pose”.
The “half moon” part of the name is represented by the shape of your body when performing the pose. The bending forwards of your torso with your standing leg mimics the crescent shape of a half moon.
How to do the Revolved Half Moon Pose

- Start in a lunge position with your right foot forwards and your left foot positioned back.
- Shift your weight onto your right foot, lean forward and begin to lift your left leg off the floor.
- At the same time, lower your left hand to the floor. Extend your right arm up towards the ceiling, twisting your torso 90 degrees to the right.
- Keep your gaze up towards your right hand.
- Hold the pose for a few breaths, then slowly unwind and return to the standing position.
- Repeat now for the other side of your body.
Variations
- For extra support: Use a yoga block under the hand that’s reaching towards the floor. This can help if you have difficultly bending forwards enough to reach the floor with your hand.
- Easier variation: Keep your back foot on the ground if you have difficultly maintaining balance.
- More challenging: Try lifting the hand that’s on the floor off the ground, so you are only balancing on your standing foot.
Tips
- Keep your core and spine engaged to help with balance while holding the pose.
- Spread your toes wide to provide additional stability to the standing part of this pose.
- If you find it difficult when gazing up towards your hand, maintain a neutral neck position or keep your gaze where it is most comfortable.
- Don’t rush. Be mindful of your body’s alignment while positioning yourself into the pose. Take your time to get into the position. Equally, return to the standing position is a slow and controlled manner.
Prep poses
- Triangle Pose (Trikonasana)
- Extended Side Angle Pose (Utthita Parsvakonasana)
- Standing Forward Bend (Uttanasana)
- Wide-Legged Forward Bend (Prasarita Padottanasana)
